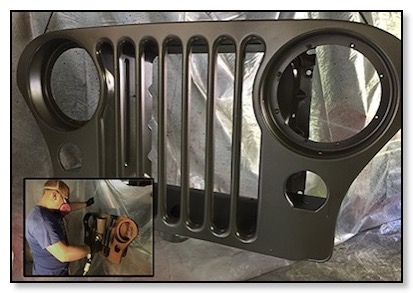
Phase II
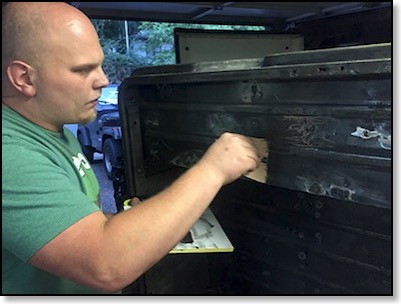
Stencil Cutting
May/14/2016 18:00
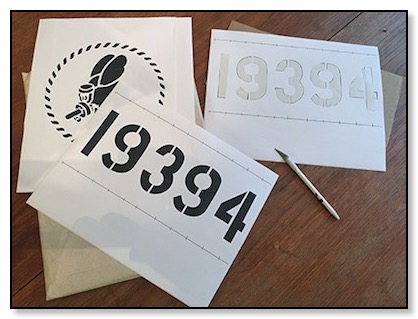
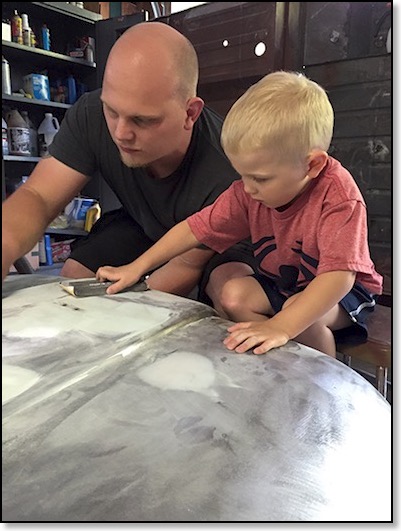
After researching the period correct stenciling for this Seabees Jeep (not an easy task) we began creating and cutting the stencils.
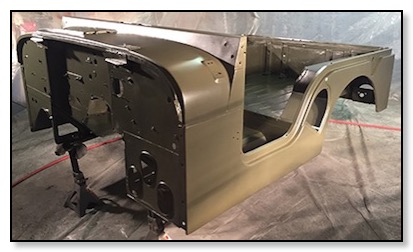
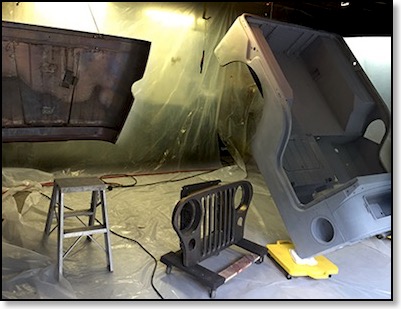
Last Major Part Painted
May/01/2016 16:00
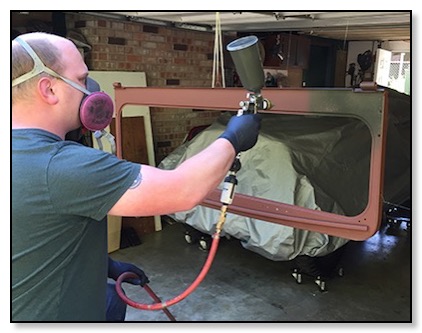
A milestone for sure—we painted the last major piece, the windshield. With the exception of a few small parts and the stencil work, we finished painting the Jeep!
Windshield Primed and Ready
Apr/30/2016 18:00
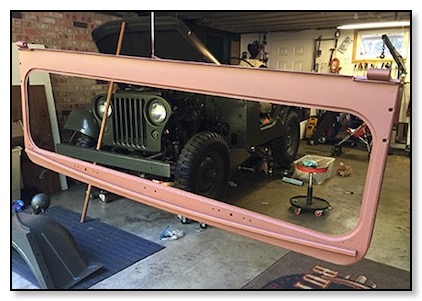
The final large part, the windshield, after returning from the the sand blaster it was primed and readied for painting.
It's off to the Sand Blaster!
Apr/30/2016 08:00
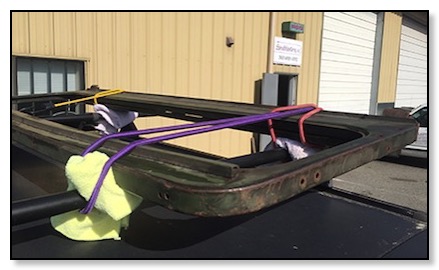
The last major part was off to the Sandblaster. The $35 saved hours of wire brushing, sanding and prepping.
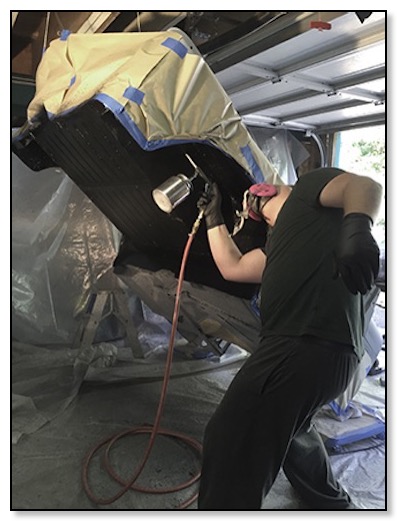
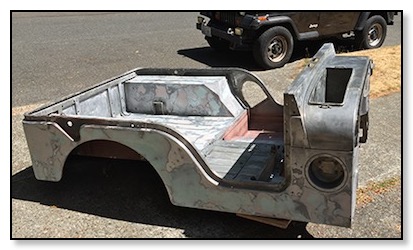
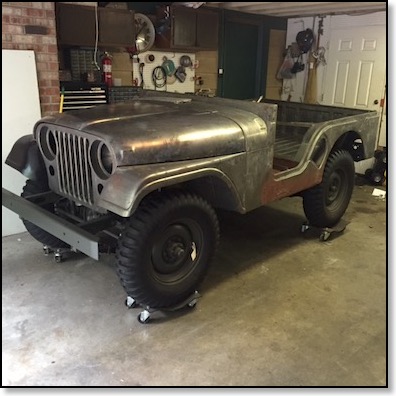
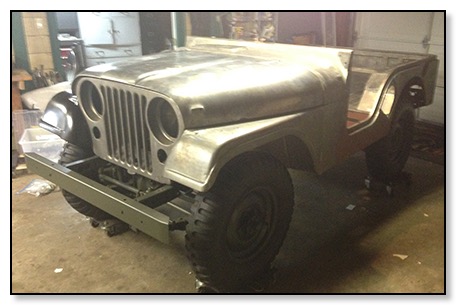
Finished Painting Body Parts
Aug/26/2015 16:00
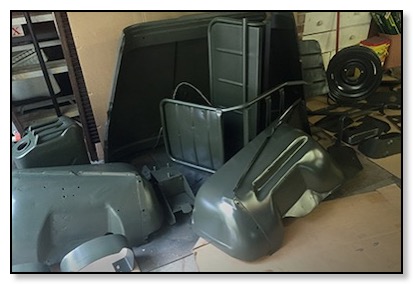
Another milestone! We finished painting most of the larger body parts. The windshield and a few small pieces, some nuts and bolts and we moved on to complete Phase III — installation!
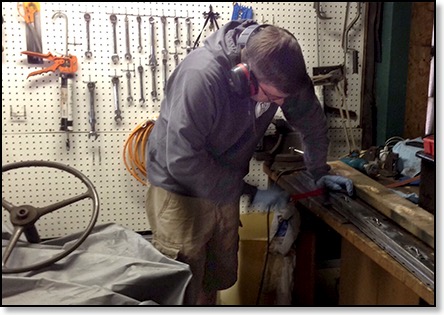
All the Help We Can Get
Aug/12/2015 17:00
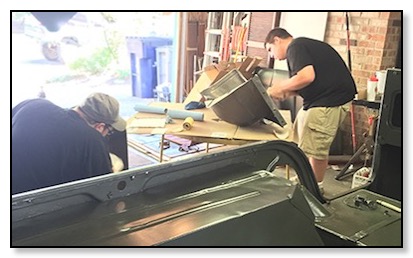
From time to time a friend or two would stop by for a visit and we put them to work on the Jeep! James and Earl stopped by to help with the fenders. Thanks guys!
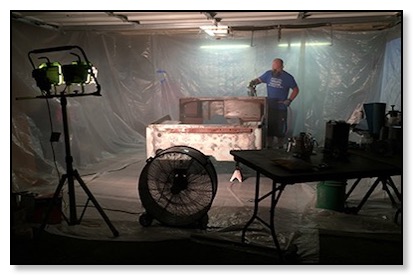
Painted Tub
Aug/03/2015 18:00
We completed painting the tub a beautiful Marine Forest Green. It looked great!
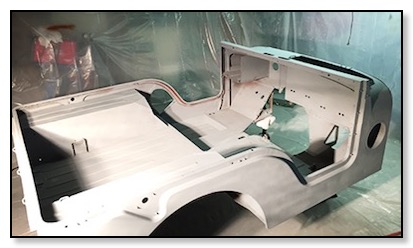
It's USMC Forest Green!
Jul/29/2015 17:00
We started the last leg of the body prep by painting the tub bottom undercoat, the hood and the grill Marine Forest Green.
Added Undercoating
Jul/28/2015 18:00
After priming the tub bottom we added a healthy layer of rubberized undercoating to protect and preserve. It is a “paint over” coating which allowed us to cover it with the the original Marine Forest Green.
Prep Hood, Grill, Tub Bottom
Jul/26/2015 18:00
We prepared the hood, grill and tub bottom with rust prohibitive prior to the primer.
Sandable Grey Primer
Jul/18/2015 17:00
We’re used sandable grey primer for the first three coats. In retrospect we should have used the red oxide primer.
Ready for Primer
Jul/16/2015 19:00
After prepping the tub we set up the garage for applying the primer.
Completed Tub Prep
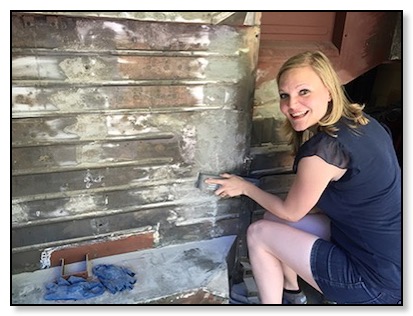
Jul/15/2015 18:00
A little dent repair, a little Bondo, and a lot of sanding and the preparations for painting the tub was complete. Thanks to all in the Motor Pool who lent a hand!
Sanding, Sanding, Sanding
Jul/09/2015 21:00
We continued to do more sanding. It took serval application and hours of sanding to flatten the panels.
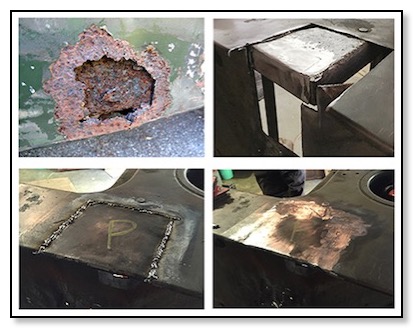
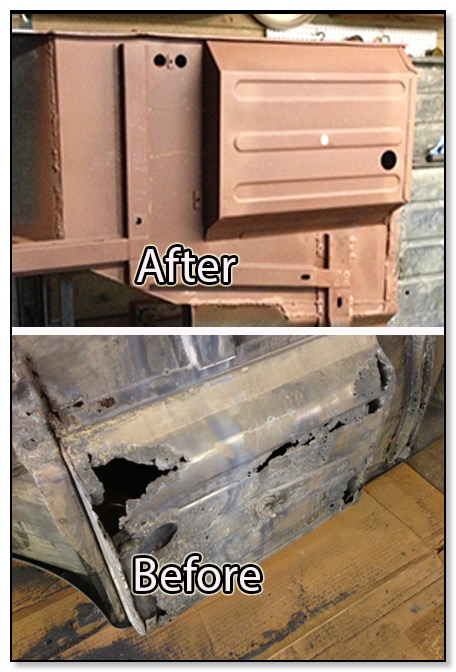
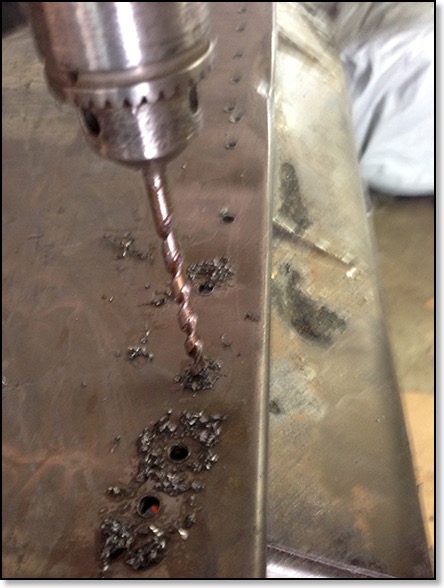
Patching Holes
Jul/08/2015 17:00
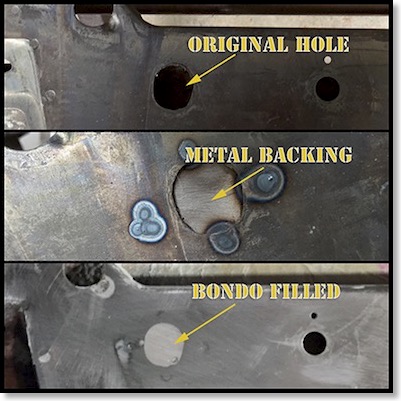
We devised a good way to fill unwanted holes and large open areas. We spot welded a sheetmetal patch on the back and then filled it with Bondo. It’s a strong patch that turned out virtually invisible.
Fixing a Few Hood Dents
Jul/06/2015 18:00
We completed the hood repair and final coating of Bondo with a little help from Danny.
All the Help We Can Get!
Jul/05/2015 19:00
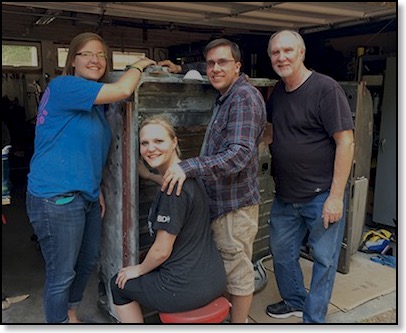
Tiffany brought her family over for a little quality sanding time! Unfortunately we lost power in our neighborhood that day so we had to cut the time short.
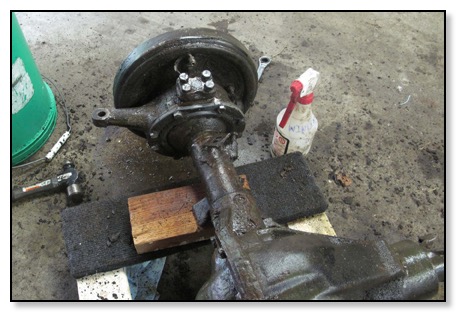
New Pinion Oil Seal
Jul/04/2015 19:00
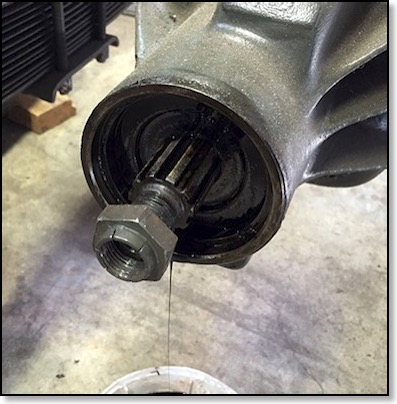
In preparation for installing the tub we completed repair and replacement of parts when it was easiest to get at them. We replaced the rear pinion oil seal which had been leaking before the restoration. We should have replaced all the seals in the transfer case as well. As it turned out we wound up replacing them later from under the jeep—much harder!
Sanding Help
Jul/03/2015 16:00
We needed all the help we could get! There were hours of sanding and filling to do!
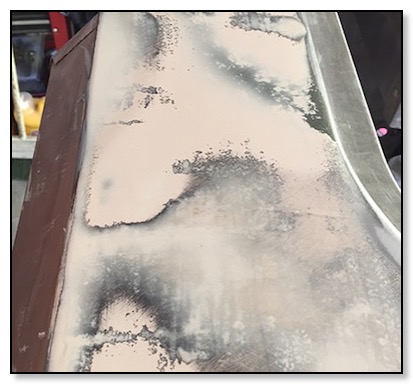
Body Filler Day 1
Jul/02/2015 18:00

When the rough stuff was done, it was time to start leveling the high and low surfaces. We used a combination of long and short fiber and Bondo.
First Application of Body Filler
Jul/01/2015 21:00
We started adding the first application of body filler. We started with long fiber filler for all the holes and small openings followed by some Bondo and glazing. At that point we hand many hours of sanding ahead of us!
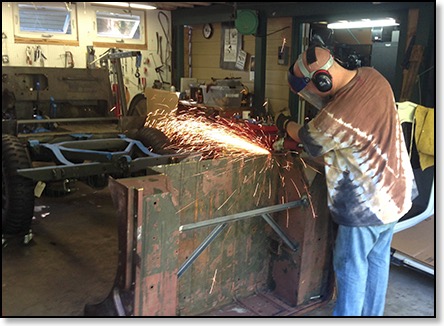
Finished Grinding the Welds!
Jul/01/2015 20:00
We finished grinding all the welds; another milestone! It was a relief for our neighbors to have their nice quiet cul-de-sac again.
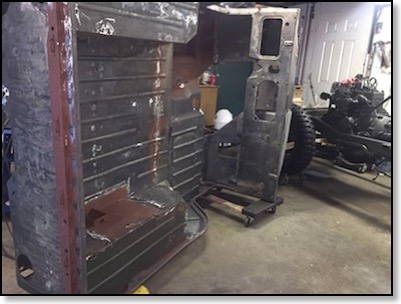
Completed Welding!
Jul/01/2015 17:00

We completed all the welding on the tub; a milestone event! Two years before we joined the halves then it was time to finish the grinding.
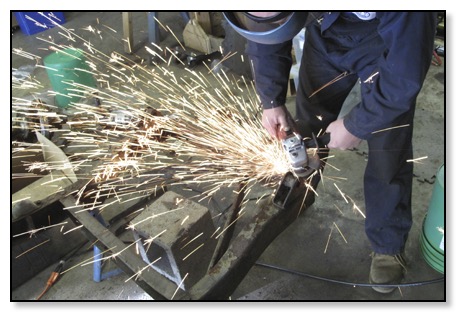
Grind Baby Grind
Jun/29/2015 19:00
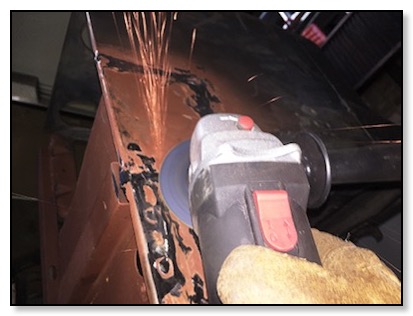
After welding patches and filling holes there came a lot of noise, sparks and metal filings as we gound down the welds.
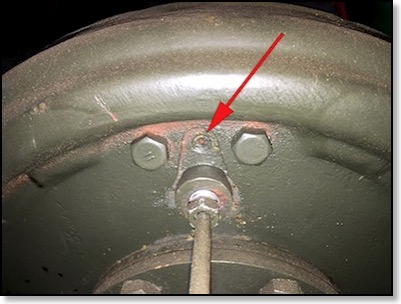
Rusted Brake Drum
Jun/28/2015 20:00
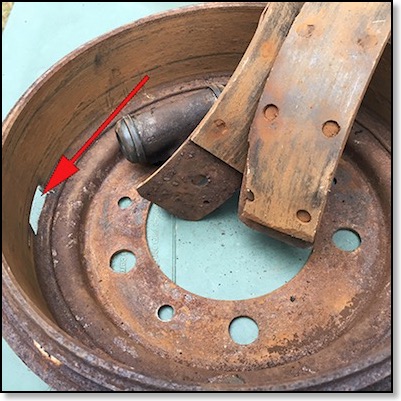
The LR brake drum was totally seized and would not budge. After doing all the adjusting, blasting, heat treatments and beating the drum it took major surgery which included drilling out the Hold Down Pins, disconnecting the brake cylinder and cutting an access hole in the drum to force it off.
Missing Bleeder Screw
Jun/26/2015 18:00
After bench bleeding the new master cylinder we prepared to bleed the brakes. When much to our disappointment the RR brake cylinder was missing the bleeder screw. That required us to replace the wheel cylinder and while we are at it we replace the brake shoes on both rears.
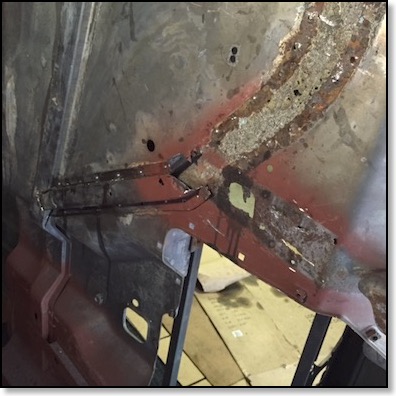
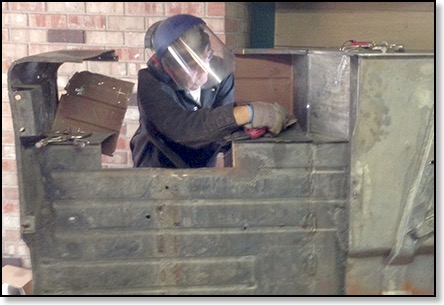
Repair Side Pannel
Jun/23/2015 18:00
The passenger side panel needed to be replace with good steel. It was complicated by having to replace three separate layers.
Grinding the Welds
Jun/21/2015 17:00
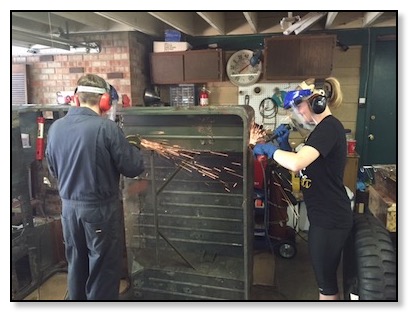
We started the important process of grinding down all the welds to ready the tub for the body filler and sanding.
Welding Spoon
Jun/20/2015 18:00
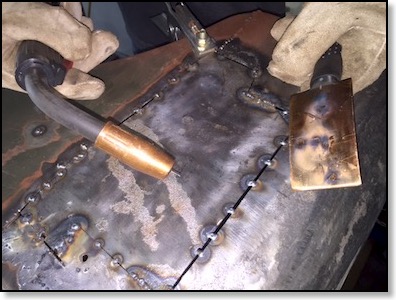
We started using a copper welding spoon to close the gaps and fill the holes. It really helps keep the welds neat and reduces the amount of grinding later.
Built Patch
Jun/14/2015 16:00
We cut out a section of the rear side panel and replaced it with a welded patch. We fabricated the patch from the old section of the tub we removed.
Floorboard Repair
Jun/13/2015 10:00
We removed the last of the corroded hat channel to get at the damaged floorboard.
Out of Hibernation
Jun/12/2015 10:00
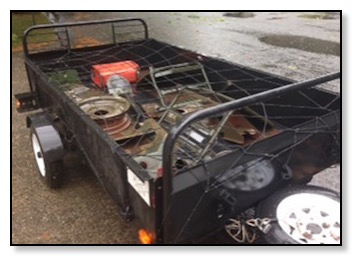
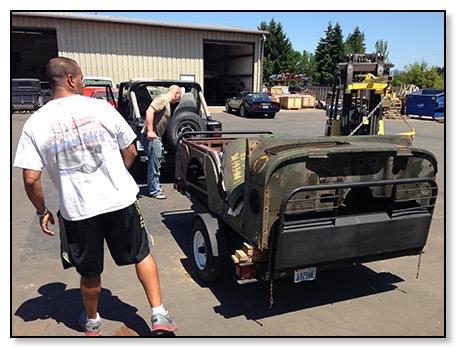
The forth season began. We took the jeep out of hibernation to begin this summer’s work. We set the ambitious goal to be driving it by September 2015! Alas, it was not to be. It took until June 2016.
Ending for the Season
Sep/22/2014 17:00
We ended the bodywork for the season. We needed the garage to provide shelter for the wife’s car. We started up our work the following June.
Franken-Jeep
Jul/21/2014 17:00
We continued to replace bad metal all around the tub. After welding the front half from the original body with a better back half from another tub we replaced the better condition passenger side wheel well from the original tub. We were down to just a few more patches.
Removing Steering Wheel
Jul/11/2014 17:00
After several unsuccessful attempts to remove the steering wheel we checked the forums. Thanks to all who share their wisdom and experience. I found a thread on G503.com Military Vehicle Message Forums - Dave from Californian had the perfect solution. It worked like a charm!
Parts Hunt
Jan/05/2014 17:00
The colder winter months provide the best time to hunt down those missing and hard to find parts. eBay and the forums make the search a lot easier.
Buttoned Up for the Winter
Sep/21/2013 14:30
Once again as the weather changed and the day job took priority we suspended work on the jeep until the Spring. We didn’t get quite as far along this season as we hoped, but progress was made. The goal was to have the jeep on the road, running by August 2014. It was not to be.
Clean and Repair Hat Channel
Jul/28/2013 18:00
The tub we picked up to replace the rear section of our damaged tub did not have the rear panel hat channel with the footman, so we removed the one from our damaged tub and straightened it out.
Wheel Well Repair
Jul/27/2013 17:00
We had to remove the passenger side rear wheel well to replace it with the better one from the discarded rear section of the original tub.
Driver Floor Pan & Gas Tank Well
Jul/26/2013 21:00
We had some very productive days. We were able to take out the rusted driver side floor pan, some corroded hat channel, the gas tank well and replaced it all with new metal. The next step was to grind smooth the welds.
Drilling Out Spot Welds
Jul/25/2013 20:00
We began the body work with the really rough stuff. Removing corroded hat channel and the gas tank well with the driver’s side floor pan. It was necessary to drill out or grind out the spot welds.
Plenty of Body Work
Jul/23/2013 18:00
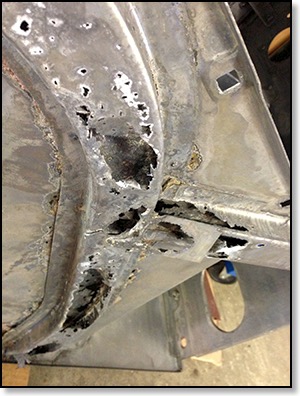
The acid dip really helped reveal the areas that needed repair. We had a number of segments of hat channel to be replaced and weak areas to patch.
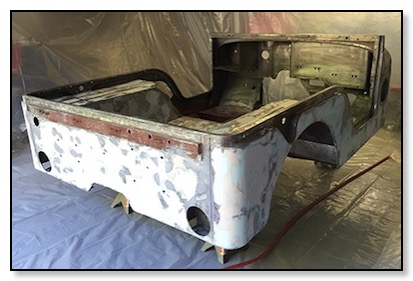
Stripped Tub
Jul/20/2013 18:00
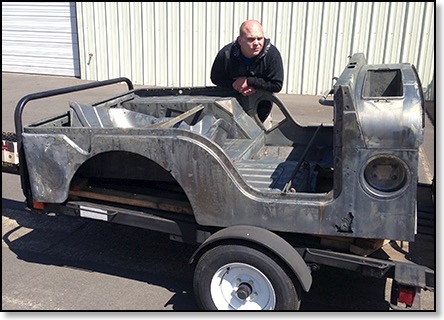
We picked up the tub, fender-D, hood, and grill from MetalWorks in Eugene Oregon after the chemical striping and rust preventative treatment. It looked great! Doing the body work was so much easier. It was easy to see every blemish. We were pleased to see how much of the body was in ready condition and also surprised to see minimal surface rust after the tub sat in the garage for over two years with no primer!
Preping More Parts
Jul/15/2013 18:00
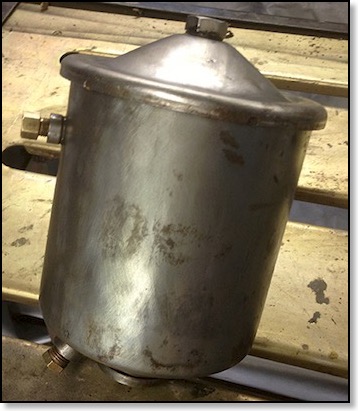
Oil Filter Canister: We spent much of our time prepping parts to go back on the jeep. The goal was to use as many parts from the original jeep as possible. We took them down to bare metal and primed and painted them with rattle cans.
Off to the Bath
Jul/10/2013 21:00
We took the tub, grill, fender-D and hood to MetalWorks in Eugene Oregon (600 mile round trip!) to have the paint and rust removed in an acid dip and treated with a rust inhibitor. We went back a week later to pick it up.
Removed Rear Hat Channels
Jul/06/2013 18:00
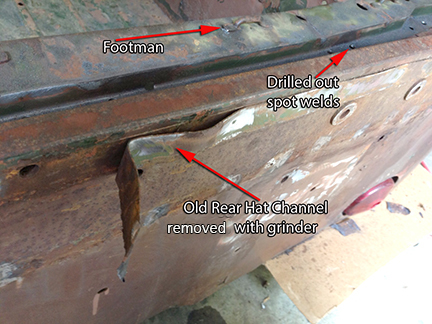
The replacement rear section of the tub only had traces of the rear hat channel so we cleaned it up and removed the correct hat channel with the footman from the original tub. We straighten it and welded on the newly added section.
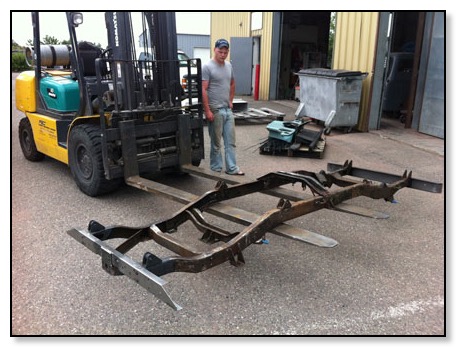
Joined the Halves
Jul/03/2013 18:00
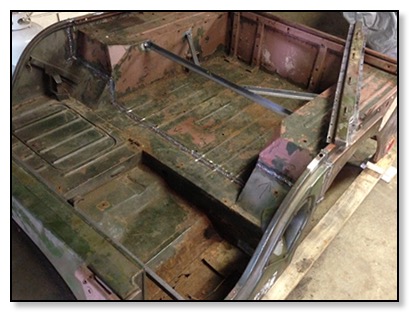
We completed joining the two halves. Then came the artistry. The challenge was to make the seams disappear! We were very happy to see how it turned out given this was our first time doing a project like this.
Fitting the Halves
Jun/30/2013 18:00
After a lot of meticulous measuring we carefully ground, cut, re-measured, and fitted the edges as close as possible in preparation for tacking and welding.
Planning the Split
Jun/28/2013 18:00
We set up the two tubs. The plan was to take the rear section from one tub and the front section from another tub and “glue” (weld) them together to make one good one to go on our restoration. It really turned out well. It’s hard to see where the seam is unless you’re looking for it.
Air Compressor
Jun/23/2013 16:00
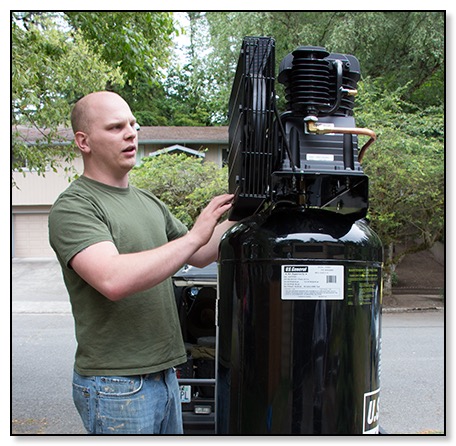
We added a 60 gallon air compressor to the shop in preparation for the body work. That purchase turned out to be an excellent choice. Especially when it came time to paint the tub and body parts!
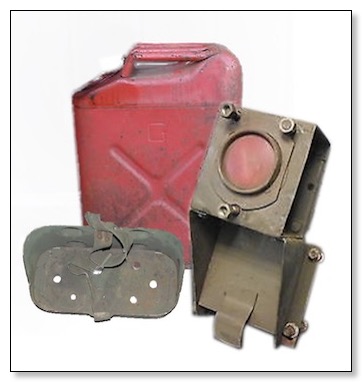
Fuel Pick Up
May/16/2013 18:00
We purchased a used fuel pick up from a seller on eBay. It appeared to be in working condition. It just needed a little clean up. It worked but because of the conversion from 24v to 12v the gage reads 1/2 full with the tank is full. We will fix that issue sometime in the future. In the meantime we see our tank as half full.
Restored Body Bolts
Apr/27/2013 18:00
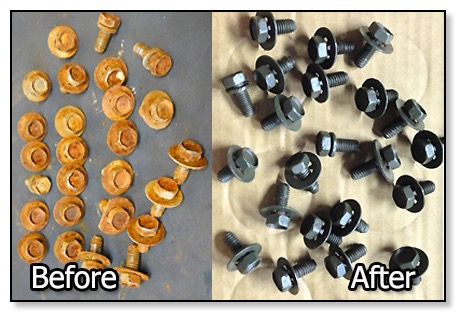
We purchased 26 original body bolts from eBay and restored them.
Clucth and Brake Pedal Assembly
Feb/20/2013 16:00
We cleaned and refurbished the clutch and brake pedal assembly while we waited for warmer weather to paint the parts. Our short term goal was to get all the components cleaned and ready for painting by June.
Extra Tub's Winter Cover
Oct/20/2012 18:00
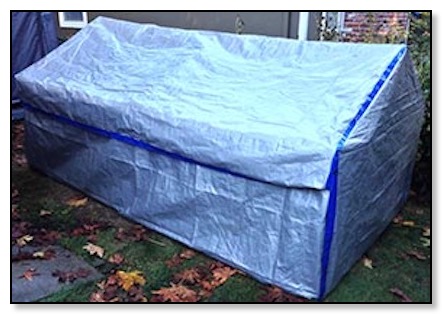
When we got the other tub, we had one with a poor rear section the other with a poor front section. In the spring we planned to take the two good parts and combine them to make one good tub. Since we live in Seattle we had to cover it for the winter. With a couple tarps from Costco, a wood frame, and sewing machine we made a portable garage for the tubs.
Parts Shopping
Oct/19/2012 16:00
The work on the jeep slowed again through the winter months. However, we used the down time to shop for parts online. We also planed the order in which we would rebuild the jeep and sought advise from forums on the internet, YouTube, and the pros on how best proceed. Hint: Ask a lot of questions!
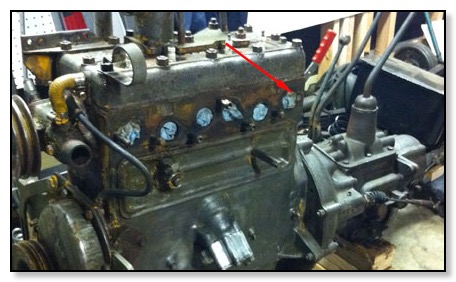
Finished Engine Restoration
Jul/29/2012 17:00
It took awhile, but the engine was restored. We mounted it on to the frame. It looked great and without all the dirt and grease it was a breeze to work on.
Cleaned and Primed Engine
Jul/26/2012 18:00
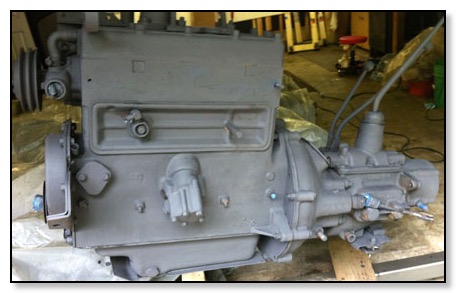
Turning the engine from a dirty greasy yellow to a nice cleaned and primed engine was about 12 hours in the making! But it was worth it! Fortunately we did not have to rebuild the engine, it ran well when we started the project. Just a few electrical and fuel issues which we addressed in Phase III.
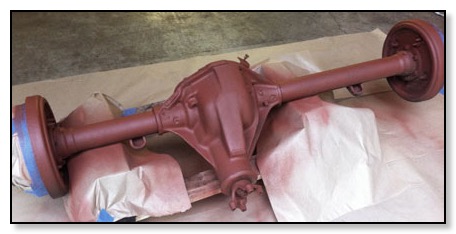
Painted Parts & Completed Tires
Jul/25/2012 17:00
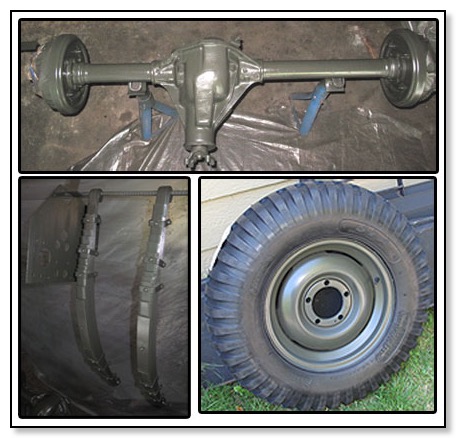
Another exciting milestone! We painted the axles and springs with the beautiful “Marine Forest Green” and installed the new tires on the freshly restored rims.
Primed Front Axle Assembly
Jul/24/2012 18:00
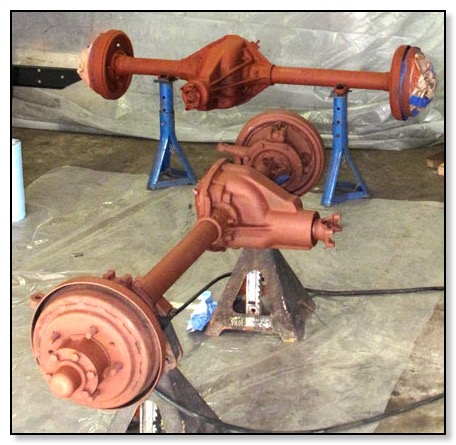
After a thorough cleaning we primed the front axle assembly.
Cleaned Front Axle Assembly
Jul/22/2012 17:00
It was very important to clean all the grease from the axle before it was primed. We used a combination of cleaners. A heavy duty cleaner from Harbor Freight, Simple Green, and a special Marine Cleaner from the auto paint store, and of course, a lot of elbow grease, scraping and wire brushing.
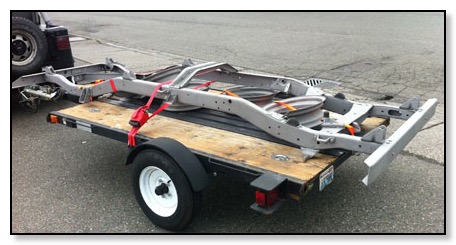
Painting Frame and Wheels
Jul/21/2012 19:00
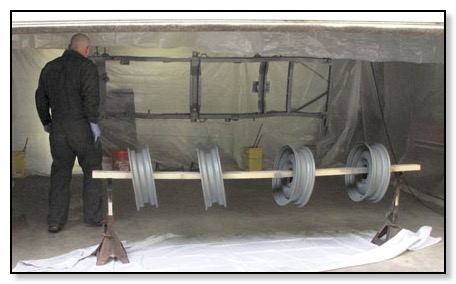
We hung the frame and put the wheels through a 2x4 on jack stands for priming and painting. Seeing the frame and wheels completed helped us visualize the finished restore. It was getting exciting!
Pick up Sanblased Parts
Jul/20/2012 20:00
We picked up the frame and wheels from the sandblasters. After checking with a number of local sandblasters the price for wheels and frame ran has high as $50 a wheel and $300 for the frame. We found a shop that did the whole job for $180!
Replacing the Manifold Studs
Jul/19/2012 17:00
While removing the engine we broke a mounting stud. They were in pretty bad shape. It sheered off flush to the engine block. After a feeble attempt to remove it we decided to take to a local machinist and had him replace them all. Some things are just better done by a professional with the right tools.
Sandblasting Frame and Wheels
Jul/18/2012 16:00
We took the frame to the sandblasters to prepare it for painting.
Cleaned Leaf Springs
Jul/17/2012 18:00
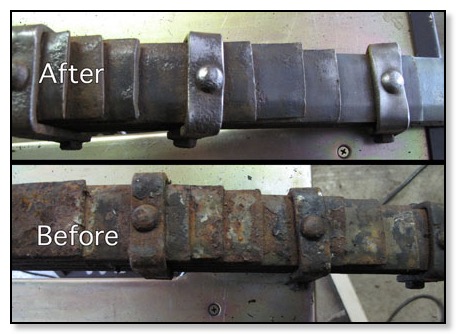
We cleaned the leaf springs by hand! It was a tedious job to say the least. It took about three hours per spring. We wanted to preserve the original 13 leaf spring assembly. The repros seem to come with fewer leaves.
New Crossmember and Bumper
Jul/17/2012 04:00
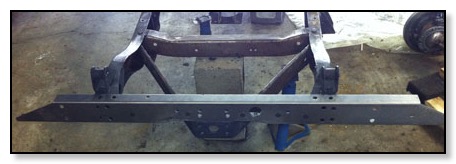
We installed the new crossmember and front bumper. The crossmember assembly required welding the pintle hook plate and the inside support in place. We also had to deal with the rivets that attach the crossmember to the frame.
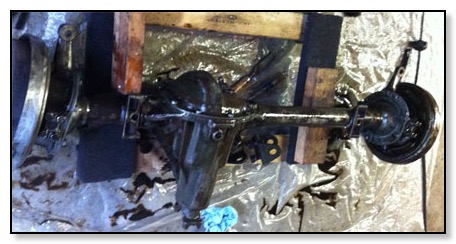
Cleaned and Primed Rear End
Jul/15/2012 18:00
Completed cleaning and applied a primer to the rear end assembly.
Prep Frame for Sandblasting
Jul/11/2012 18:00
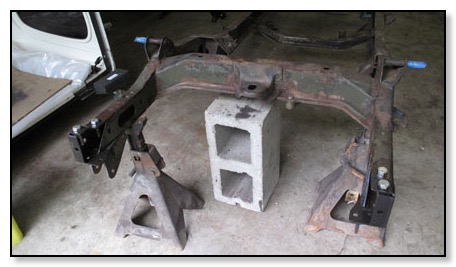
We spent some time preparing the frame for sandblasting; degreasing, scraping paint and removing a few more parts. Both the front bumper and rear crossmember were replaced prior to sandblasting.
First Painted Part
Jul/10/2012 16:00
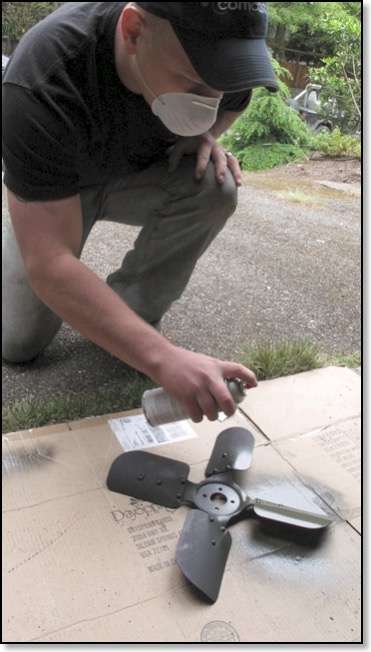
Another landmark event, we painted in Marine Forest Green on our first fully resorted part—the fan. Many more parts followed, some new, some restored, as we looked forward to Phase III, reassembly.
Removing Rear Crossmember
Jul/07/2012 18:06

After some discussion we decided to replace the rear crossmember. It was in poor shape and sustained quiet a blow in a rear end collision resulting in a slight bow inward with tears and buckles in the metal at both ends near the rivets. We decided to also replace the “V-Brace”. Bad idea! We made another newbie mistake. [Check out the Learning Curve]
Removing the rivets was accomplished by grinding the top off clear down to the surface of the frame (carefully) until we could see the outline of the rivet shaft. Then we chiseled the other side to loosen the shaft followed by a center punch and multiple hard wraps with a big old hammer. In some cases we drilled partially into the rivet to help hold the punch in place. Patience is the key ingredient! The whole operation took about three hours.
Prep Parts for Paint
Jul/03/2012 17:00
We spent hours in the step by step task of cleaning, repairing, or replacing parts in preparation to paint them.
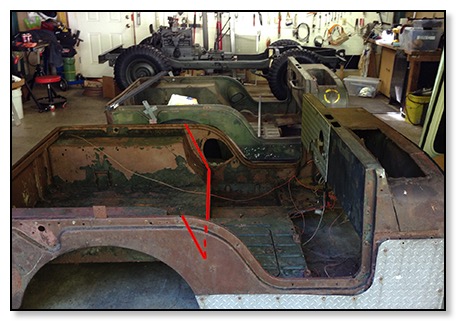
Tub Repair Section
Jun/09/2012 16:00
Our jeep’s tub had some serious damage to the right rear corner and tailgate. It was beyond simple body work. We were able to locate this “donor” tub in rough shape except for the part we needed! (see the red outline). It appears the back end had been covered keeping the area we were interested in relatively good shape, with just a little rust and a few small dents.
Refurbish Generator
May/30/2012 20:00
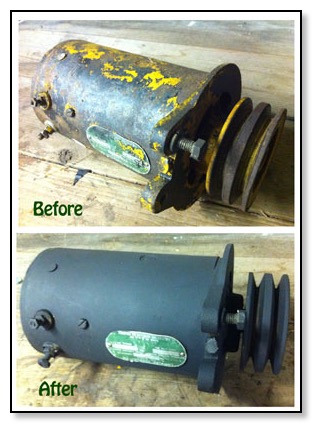
The restoration season began anew. The cold winter months kept us out of the garage. But as the weather warmed we eagerly got back into the project. The 12v generator was the first of many parts that we repaired, restored or replaced in preparation for the reassembly Phase III.
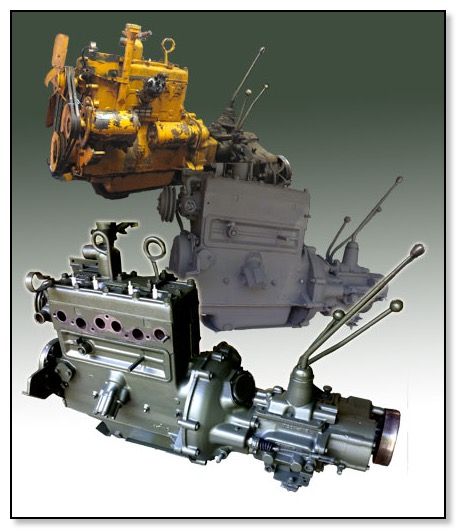
Pulled Drive Train
Nov/19/2011 17:00
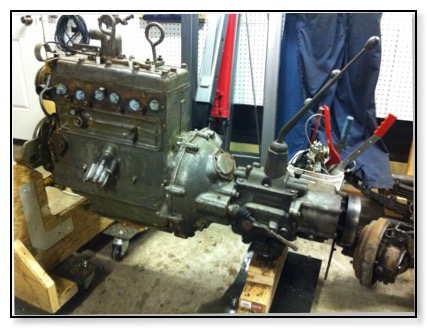
The engine was not the original engine, it’s an L-134 “Go Devil.” It was in good running order so we will use it for the first build, then the plan is to swap it our for an F-134 “Hurricane” engine—the period correct engine. The only things we will need to do to the L-134 is fix two broken manifold studs, one on the exhaust manifold and one on the block and add a correct mechanical fuel pump. The yellow paint was removed in preparation for painting the engine in beautiful Marine Forest Green. Note: Later in Phase III we chose to replace the electrical components as well.
Completed Tear Down
Oct/29/2011 06:00
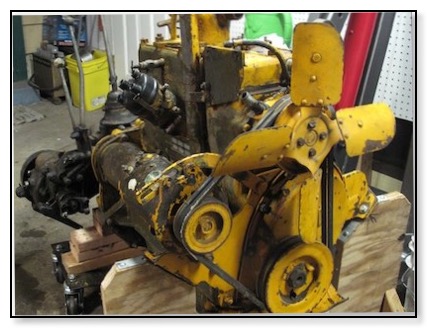
The first order of business was to remove the old paint from the engine. This engine was rebuilt in 1958. It was sold to a school district in Utah. We believe it was painted yellow while the school district owned it. We found the Marine Green under the yellow.