Phase III
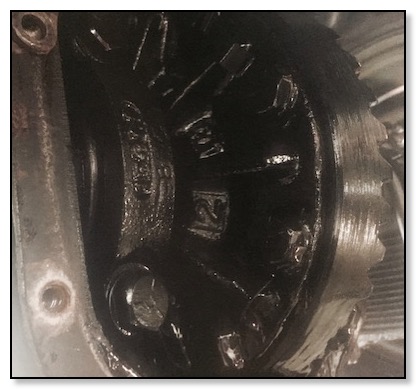
New E-Brake Shoes
Jun/27/2016
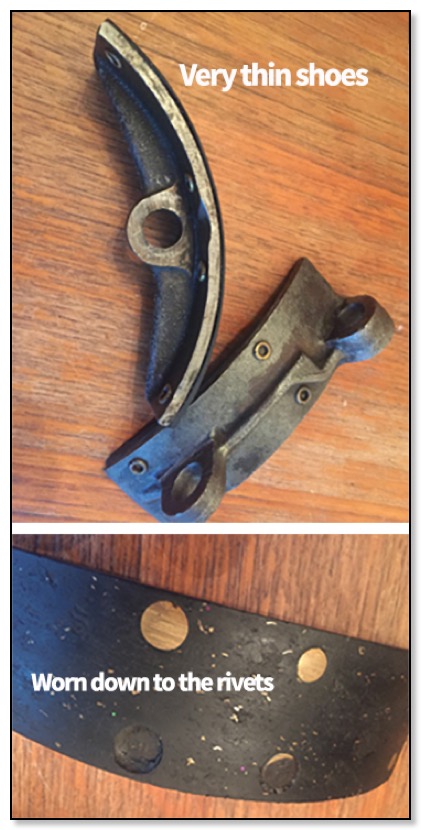
We added new emergency brake shoes. As you can see they were worn down to the rivets.
Lunch at Dick's Drive In
Jun/27/2016
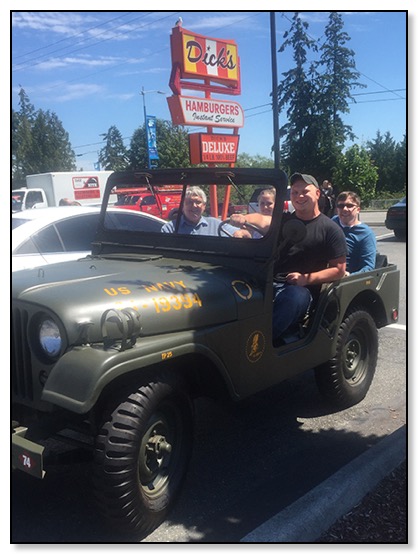
Five years ago, on August 25, 2011, we took our last ride in the pre-restoration Jeep to Dick’s Drive In, (a popular fast food restaurant chain in Seattle since 1960) and promised we would never come back until the Jeep was fully restored. It was to be an added motivation because we all loved to eat there. We did not anticipate it would be five years later! Never the less, it was a wonderful milestone event and the burgers, fries and a milkshakes were better than ever! Way to go team!
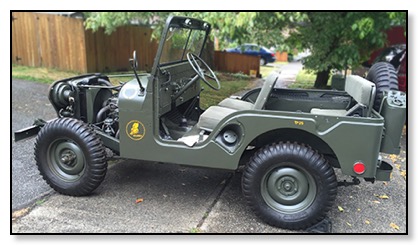
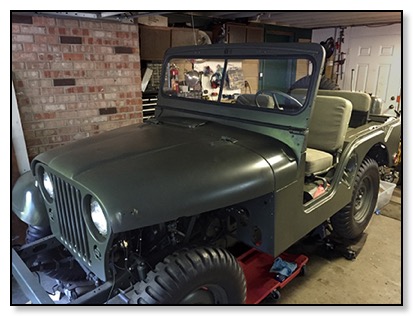
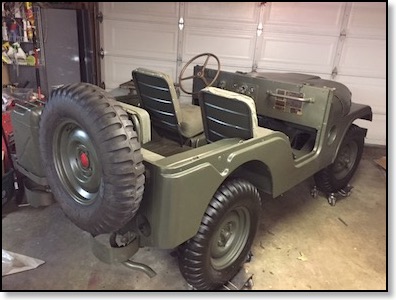
It's Done! (Well Almost)
Jun/23/2016
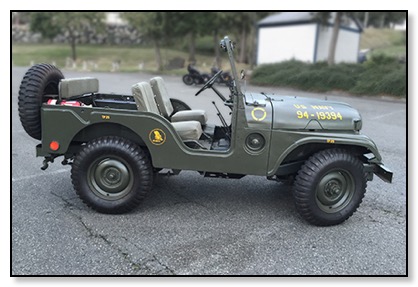
We took the Jeep back on the road after a five year frame off restoration. It's hard to explain the feeling of accomplishment and pride we have in the project. We'll be taking it to shows and parades over the summer and of course tweaking it here and there.
Checking for Leaks
Jun/18/2016
Finally it was time to check the engine, adjust the timing, check and fix fluid leaks and let it run awhile to make sure everything is ready for the first road trip since the restoration.
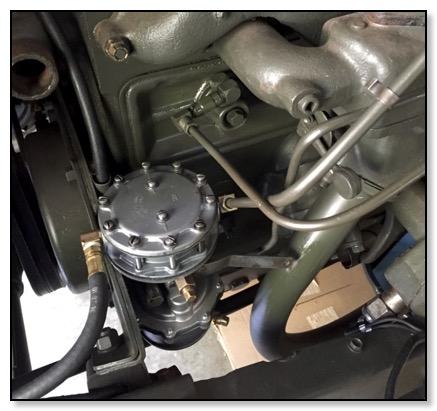
Temporary Solex Carburetor
Jun/17/2016
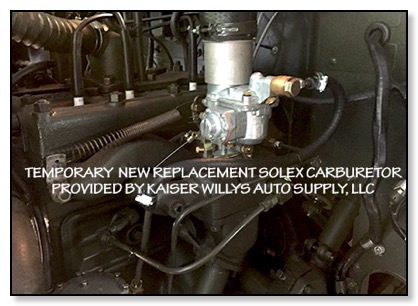
Near tragedy averted by Mike at Kaiser Willys Auto Supply, LLC. We sent our carburetor in for a professional rebuild. We expected it to be back in time for our season debut and our first show, June 23rd, the 4th of July parade, and our triumphal return to our first show (five years ago) the Meridian Park Classic Car Show. Kaiser Willys had a problem with their vendor and it delayed shipment for another month. When Mike heard about our dilemma he offered to loan us a new Solex Carb until our Carter WO was ready. Thanks for your above and beyond customer support Mike!
Added the Markings
Jun/11/2016
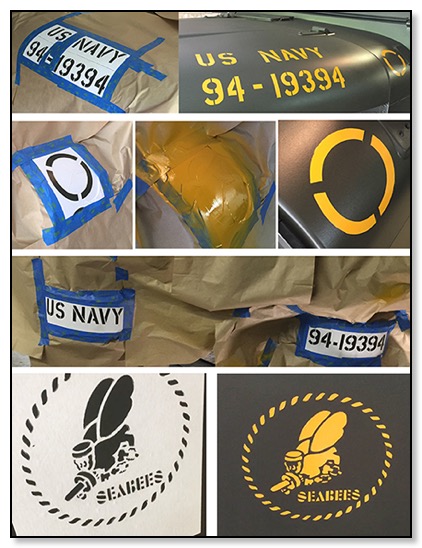
Yet again, another milestone; we painted the markings, establishing the correct military branch and hood number.
A Little Touch Up Paint
Jun/04/2016
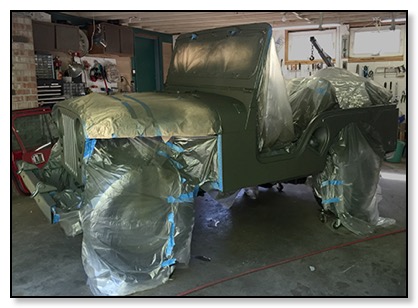
We put another coat of paint on the Jeep to fix a few runs, nicks, and scratches.
It's Wired!
May/23/2016
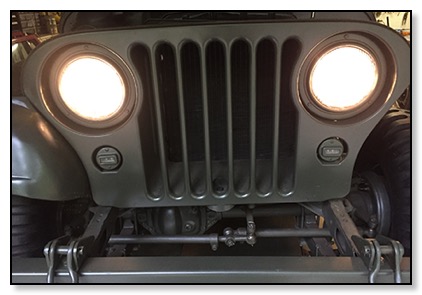
We completed the connections to all the electronics; ignition, lights and the horn. Nothing like the simple days of common sense components. Especially if you’re willing to trade comfort, safety and reliability for pure fun!
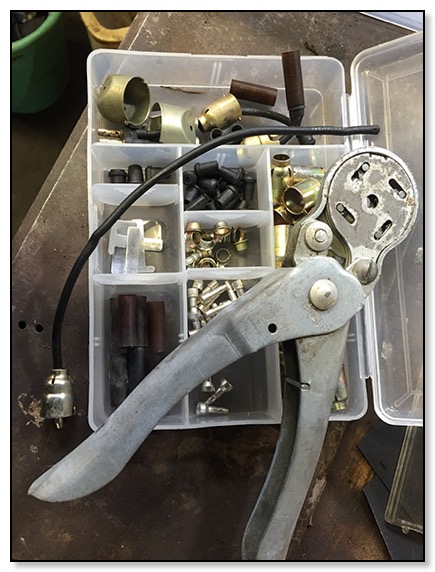
Grill Welting
May/20/2016
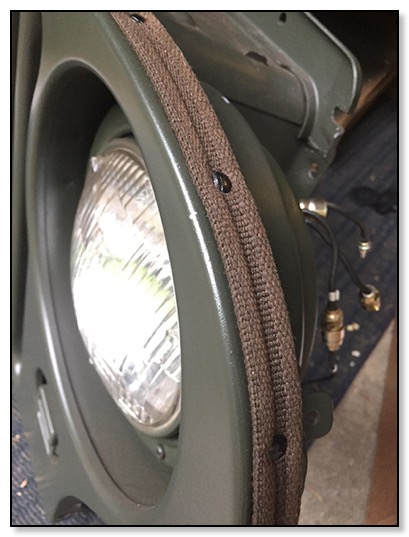
Installed the Grill Welting with split rivets. It is a coated heavy cotton welting used on the top of the grill as a cushion for the hood to sit on.
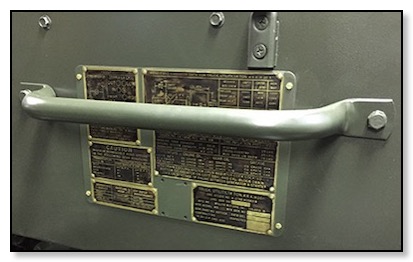
Serial Number Data Plate
May/18/2016
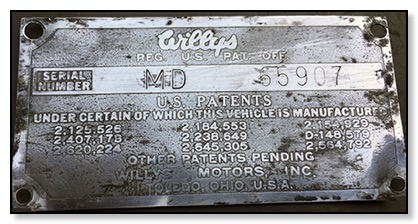
Installed the all important Serial Number Data Plate. This identifies the model and serial number of the Jeep. They were not issued VIN numbers in those days.
Jerrycan Strap
May/15/2016
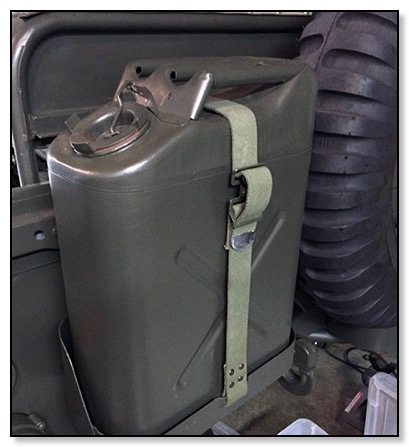
Installed a new Jerry Can strap after replacing the reproduction buckle with the original one from the old strap.
Vacuum Wipers Installed
May/08/2016
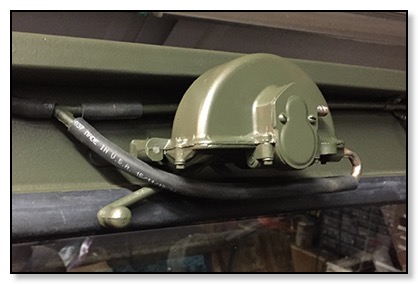
We installed the vacuum wipers. They are not the most reliable but that’s what they used sixty plus years ago!
It's a Jeep!
May/06/2016
It’s a Jeep! We installed the windshield and suddenly it looked like a jeep. The project was nearing completion and the anticipation for the first road trip was building!
Installed the New Coil
May/06/2016
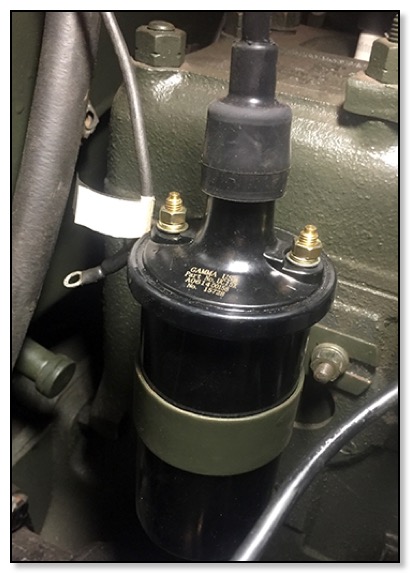
Before the restoration the Jeep would cut out from time to time. It could have been fuel, or spark, but a few new components seemed prudent.
Replaced Themostat
May/05/2016
Replaced the Thermostat while in the process of fixing a coolant leak from one of the bolts in the thermostat housing.
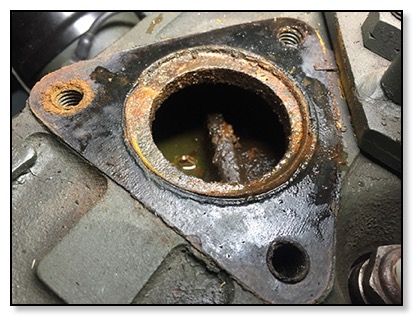
New Distributor
May/04/2016
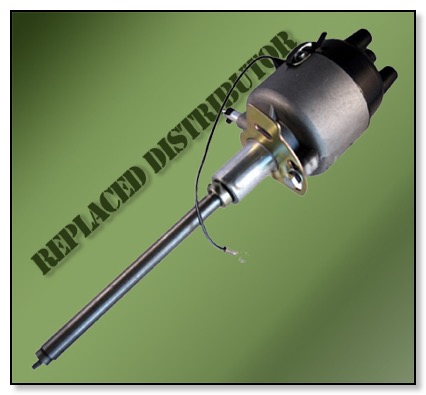
We decided to replace the distributor. After having some trouble getting the old one out, we struggled again trying to put the new one in until we discovered that the replacement had to be rotated 180 degrees! It turns out the oil pump slot is slightly off center.
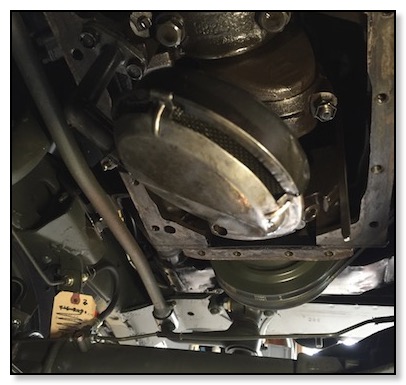
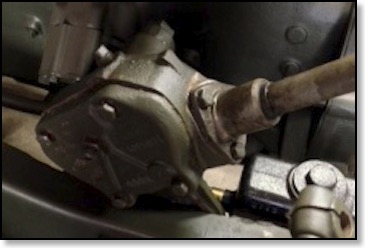
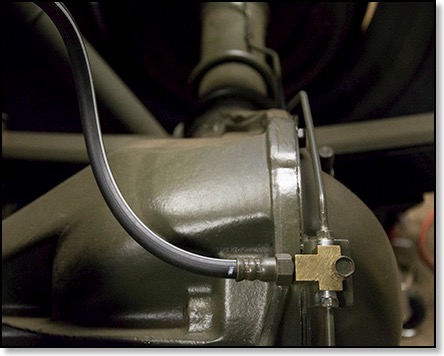
Replaced Transfer Case Seal
Apr/29/2016

Replaced the transfer case rear output seal. It was leaking, probably due to sitting in the garage for 4 years and drying out. It would have been so much easier when the drive train was out!
New Douglas Connection
Apr/27/2016
Some of the headlight wires and Douglas connections had to be replaced, the originals were old and cracked.
Engine Up and Running!
Apr/20/2016
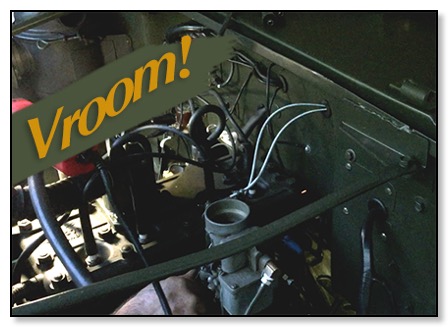
The engine came back to life! This was a big milestone for our project. It had a little trouble starting, some fresh coil and spark plug wires, along with some cranking to care of it.
Test Run Check List
Apr/19/2016
Prior to starting the engine we completed the following items:
* Adjusted Pulley Belts • Filled Oil Bath Air Filter • Torqued all bolts
• Primed Fuel Lines • Installed Battery • Checked all Electrical Grounds
• Drained and refilled Differentials • Installed and filled Radiator
• Installed Fan Belts • Hooked up Manual Throttle • Filled Engine Oil
• Hooked up Manual Choke • Drained and fill Transmission
More Parts Installed
Apr/17/2016
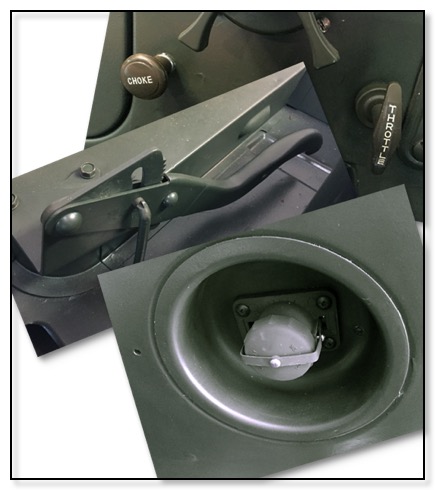
We completed a number of tasks including installation of the the Slave Cable Plug Connector, the Hand Brake assembly and the Choke and Throttle Cable hook-up.
Installed the Rebuilt Fuel Pump
Apr/16/2016
We installed the rebuilt fuel pump. We bought a correct “working” military fuel pump from eBay, but decided to rebuild it—just in case. When we bought the jeep it came with a “Bubba” electric fuel pump setup probably from a CJ.
E-Brake Prep and Gear Oil Change
Apr/09/2016

Started prepping the e-brake assembly and finished changing the gear oil in the transfer case and transmission. It was in pretty bad condition. Water gushed out ahead of the oil. It must have been a long time between oil changes.
Changed Differntial Oil
Apr/03/2016
We changed the differential oil front and back. The oil must have been in there a long time because it was pitch black and sludgy. Defiantly time for a change.
Oil Pan Gasket
Mar/26/2016
With spring the new season of restoration began. We started by installing a new oil pan gasket. We began working our way through the build, reinstalling the last parts and checking torques, claps, hoses, and connections.
90% There!
Sep/27/2015
We made great progress in the summer. We got the build to 90% complete. We had to put her to bed for a long winter’s nap and get her up and running once again in the spring. Ya got to love it ! “It’s a Jeep Thing.”
Installed Wire Harness
Sep/20/2015

It took a few weekends to get the wiring harness installed. We started with a purchased harness for an M38A1 and had to change some of the setup to work with our L-134 engine and the 12v conversion. We heard the horn for the first time!
Installed the Fuel Tank
Aug/15/2015
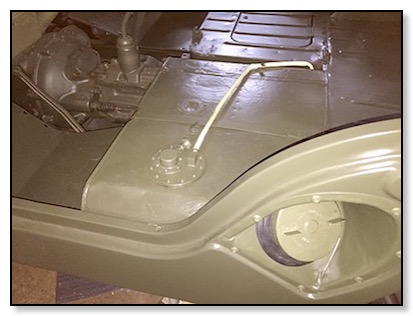
We installed the correct fuel tank. The jeep had a “Bubba” tank strapped in the tub bed feeding an electric pump!
Data Plate
Aug/14/2015
Some parts are just too much fun to put back on. The Data Plate is one of those parts!
The Tub is Back On!
Aug/05/2015
It was a long time coming but the tub was finally back on the chassis! It was a milestone for sure!
Exhaust Assembly
Jul/28/2015
We installed the new exhaust assembly. Hint: Leave the exhaust manifold connection loose until all the sections are mounted.
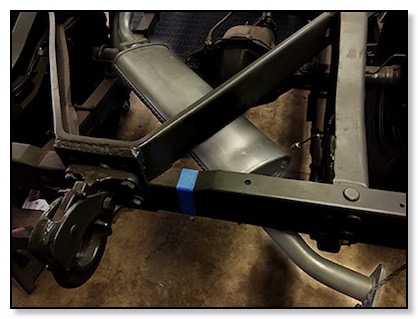
Installed Propeller Shaft Assembly
Jul/21/2015
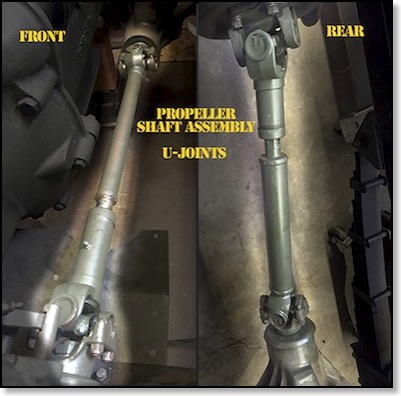
We installed new u-joints and the propeller shafts front and rear.
Clutch Cable Boot
Jul/10/2014
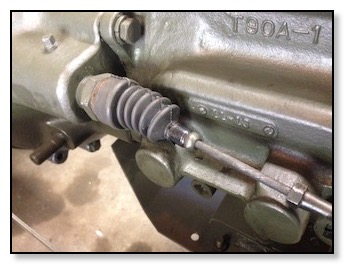
After a little late start we are continued the restoration. We installed the Clutch Cable Boot. It turned out to be a real ordeal. To install the boot you have to remove the cable, in doing so the fork dropped into the bell housing. That took some time to retrieve. The boot was a little smaller than the original which required a little jury rigging.
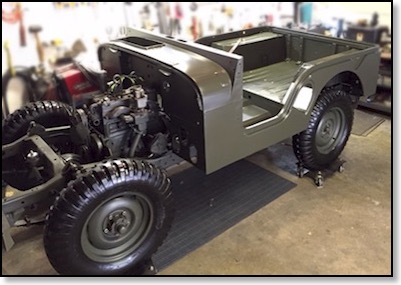
The Rolling Chassis
Aug/02/2012
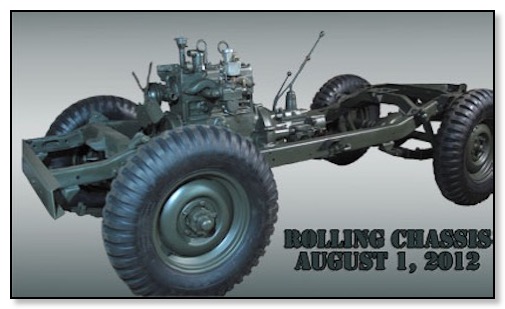
We started the rebuild phase with a big crew. We had four of the six motor pool crew and Ray’s cousin James. Needless to say we got a lot accomplished. We were able to install the suspension, both axles, the tie rods, wheels, and engine. The build gave us a little trouble from time to time. We discovered that we had received the wrong u-bolts for the springs. We made due, however we will have to replace the rear bolts before we take it out on the road. We also will have to replace the wheel studs and lug-nuts as well. The brakes on the left front tire had seized making our plans for a “rolling” chassis impossible. After freeing the brakes we installed the tie rods, the engine, manifolds, and carb. What a great day! We are now ready to take it to a local car show and display our one year progress—as a rolling chassis.
Phase III - Rebuild
Aug/01/2012
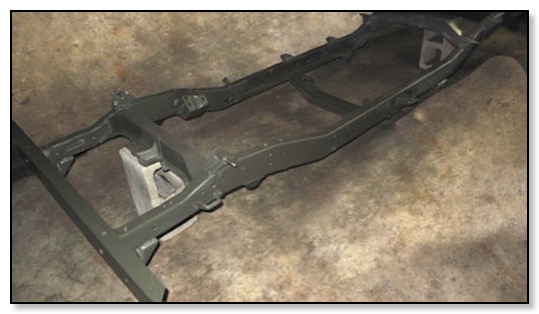
Phase III, the most fun! We added parts, one by one until the restoration was complete. Our first priority was to get the rolling chassis complete. Basically everything that is not body related.
Getting Ready for Reassembly
Aug/01/2012
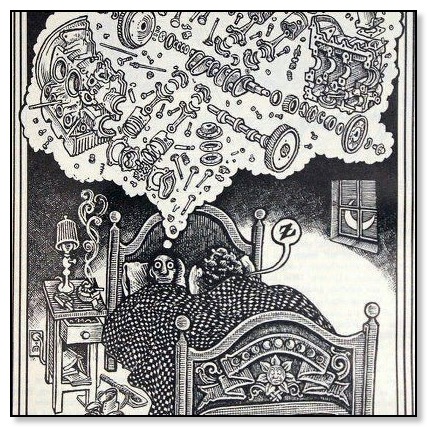
Next came the fun part—putting all the pieces back together!
